1 Introduction
This article is going to describe how to create a trigger/continuous checking on a data set using an Azure function app, this article has used Azure CosmosDB as a data set with multiple documents. Sample application shows how to get an alert or a notification when a vehicle is going to violate the speed limit in a road or in a highway. Let's dig into deep and how to use Azure function app to find a solution to this scenario
2 Background
If you are interested in Azure and its features, check these articles
3 Create a document in Azure Cosmos DB
3.1 Let's create Azure Cosmos DB account
Go to Azure Cosmos DB and navigate to Azure portal, Click on Add button, It will show Azure Cosmos DB account creation page. Add account name and select an API from list. In this example, we want to work with a simple document collection, so choose SQL as the data API
You can select a subscription for billing of the account as below.
You can create a newresource group or use an existing one.
Select account location as a nearest region to your clients.
You can see a option to enable geo redundancy. At this point we are not going to replicate this data into another region, so don't tick that option. You can later replicate your data into different places to achieve high availability of your data.
You will be redirected to Quick Start page, you can create a collection in various platforms, in this case let's use .NET Core
You can get an idea what is the default storage of your collection, what will be the throughput and estimated hourly billing of the collection.
3.2 Create a document in Azure Cosmos DB collection
Let's try to create a document in Azure Cosmos DB collection, Go to Data Explorer, your new database account is created. Create a new collection, We can create a document in that collection. Lets give some test data and create a document as below.
3.3 Query a collection
Click on your collection and click on New SQL Query, In the New Query window, write the simplest query and execute it. You can see inserted document as a result, and it has required 2.28 request units to run the query
4 Create a document programmatically in Azure Cosmos DB
We created a document in Azure Cosmos DB collection using Azure portal, Let's see how we can create a document in Azure Cosmos DB programmatically
4.1 Create a console application
Open Visual Studio, This example has used Visual Studio 2017 with .NET Core 2.0.3 version to create the application. Select .NET Core and ASP.NET Core Web Application, You can give a name and click on OK button
We need to add necessary references to access Cosmom DB,
Go to Tools -> NuGet Package Manager -> Manage NuGet Packages for solution, Search for Azure Document DB, it will show as below.
This version of Cosmos DB references are not compatible with .NET Core 2.0. So we have to find another one
Search for Microsoft.Azure.DocumentDB.Core, then you can find a reference that compatible with .NET Core. This is a special version of Document DB library designed for .NET Core application
4.2 Create Cosmos DB settings
Create a class named
DBConnector and inside that, create a method as follows
First we need to create a DocumentClient to connect to the database account, we have to pass
endpoint url and
auth key
static class DBConnector
{
static DocumentClient client;
public async static Task Create ()
{
try
{
string endPointUrl = "";
}
}
}
4.3 Create a Document Client to connect to the database account
We have to instantiate a
DocumentClient object to connect to Azure Cosmos DB account, in order to do that we have to pass
service endpoint URL and
auth key or a
token, Let's see how we can find them
Go to
Keys section in Azure Cosmos DB account, Get the
URI and
Primary Key to connect to Azure Cosmos DB account
static DocumentClient client;
public async static Task Create ()
{
try
{
string endPointUrl = "https://highwaytraffic.documents.azure.com:443/";
string primaryKey = "jSuZYTAvpOiw65P1O1TEPD7pAmjTTDUd5I9pudCkABUz97f3fxcnjg259o7jqDNCJXDyRAQrjOm6H2k24ZjyrQ==";
}
Create a Document Client by passing endpoint URL and key
client = new DocumentClient(new Uri(endPointUrl), primaryKey);
4.4 Create the database
Create the database by passing database name
public async static Task CreateDatabase (string database)
{
var db = await client.CreateDatabaseIfNotExistsAsync(new Database { Id = database});
}
4.5 Create a Collection
Create a document collection by passing database name and collection name
 public async static Task CreateCollection(string database, string collection)

 {


    var databasecollection = await client.CreateDocumentCollectionIfNotExistsAsync(UriFactory.CreateDatabaseUri(database),

                new DocumentCollection { Id = collection });

  }
In the main method, pass database and collection name and call database and collection creation methods
string databaseName = "trafficdata";
string databaseCollection = "vehiclespeed";
client = new DocumentClient(new Uri(endPointUrl), primaryKey);
await CreateDatabase(databaseName);
await CreateCollection(databaseName, databaseCollection);
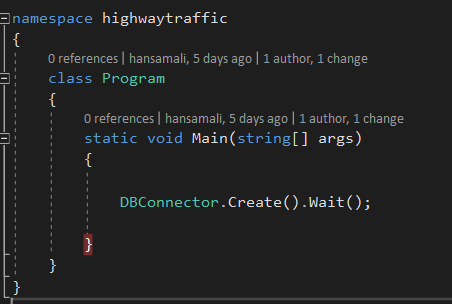
call database create method from main program as below,
namespace highwaytraffic
{
class Program
{
static void Main(string[] args)
{
DBConnector.Create().Wait();
}
}
}
Let's run the application and see database is created in Azure account, Go to
Overview tab in Cosmos DB account and check whether database is created. In
Collections tab, it shows
database and
collectionid
4.6 Create a document in a collection
In order to create a document, we should have a object, In this example we try to find vehicles who exceeds certain speed limit, so need to create a class to store vehicle speed, Add a class called VehicleSpeed into the solution,
namespace highwaytraffic
{
public class VehicleSpeed
{
[JsonProperty(PropertyName = "vehicleNumber")]
public string VehicleNumber { get; set; }
[JsonProperty(PropertyName = "speed")]
public double Speed { get; set; }
[JsonProperty(PropertyName = "city")]
public string City { get; set; }
}
}
Create a document by passing database and collection ids, And specially you should pass a instance from a VehicleSpeed class
public async static Task CreateDocument (string database, string collection, VehicleSpeed vehicleSpeed)
{
await client.CreateDocumentAsync(UriFactory.CreateDocumentCollectionUri(database, collection), vehicleSpeed);
}
Create an instance from
VehicleSpeed class, and pass it to the document create method
VehicleSpeed vehicleSpeed = new VehicleSpeed { VehicleNumber = "KJ -7788",
City = "Colombo", Speed = 100.78 };
await CreateDocument(databaseName, databaseCollection, vehicleSpeed);
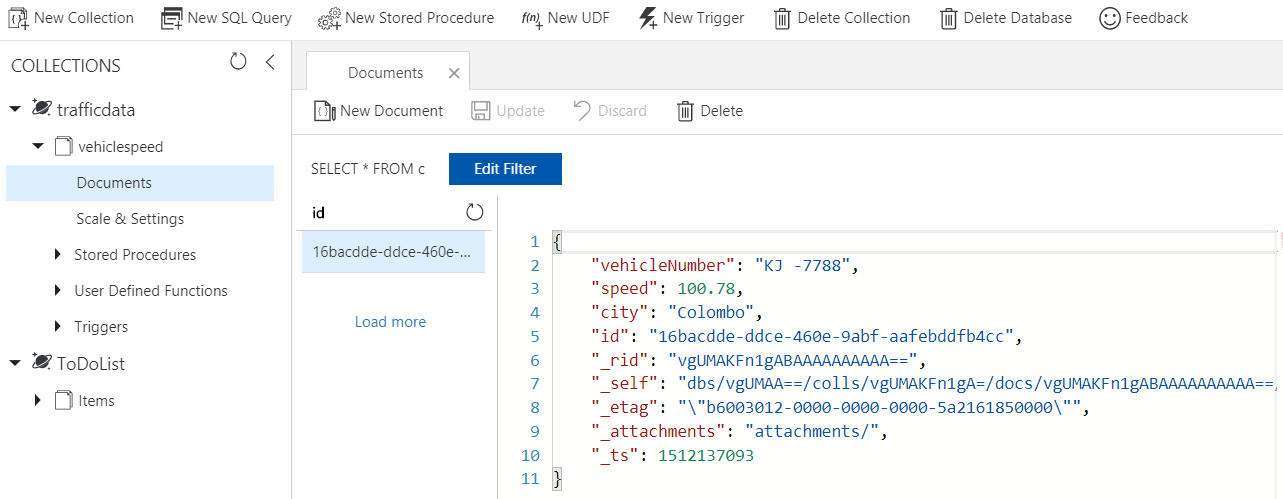
Let's run this latest code and see whether document is created,
Click on
Data Explorer, then it shows database
document inside the
collection, Click on
Documents, you can see created document with few other
meta data
4.7 Create multiple documents in a collection
We have to create multiple documents to demo this application, let's see how we can do that
Create a for loop and insert few documents with a random speed value as below
public async static Task CreateMultipleDocument(string database, string collection)
{
int documentCount = 500;
for (int i = 0; i < documentCount; i++)
{
double speed = new Random().NextDouble() * 100;
VehicleSpeed vehicleSpeed = new VehicleSpeed { VehicleNumber = "KJ -7788",
City = "Colombo", Speed = speed};
await client.CreateDocumentAsync(UriFactory.CreateDocumentCollectionUri(database,
collection), vehicleSpeed);
}
}
Let's call this method and check whether it works,
await CreateMultipleDocument(databaseName, databaseCollection);
Let's run the application and see how it works, Go to Documents, it shows inserted documents as follows,
Click on
New SQL Query and Get a
count of documents as follows,
SELECT COUNT(1) FROM c
We created required no of documents for this demo, You can find the full code from below,
static DocumentClient client;
public async static Task Create ()
{
try
{
string endPointUrl = "https://highwaytraffic.documents.azure.com:443/";
string primaryKey = "jSuZYTAvpOiw65P1O1TEPD7pAmjTTDUd5I9pudCkABUz97f3fxcnjg259o7jqDNCJXDyRAQrjOm6H2k24ZjyrQ==";
string databaseName = "trafficdata";
string databaseCollection = "vehiclespeed";
client = new DocumentClient(new Uri(endPointUrl), primaryKey);
await CreateDatabase(databaseName);
await CreateCollection(databaseName, databaseCollection);
VehicleSpeed vehicleSpeed = new VehicleSpeed { VehicleNumber = "KJ -7788",
City = "Colombo", Speed = 100.78 };
await CreateDocument(databaseName, databaseCollection, vehicleSpeed);
await CreateMultipleDocument(databaseName, databaseCollection);
}
catch (DocumentClientException de)
{
Exception baseException = de.GetBaseException();
Console.WriteLine("{0} error occurred: {1}, Message: {2}", de.StatusCode, de.Message, baseException.Message);
}
catch (Exception e)
{
Exception baseException = e.GetBaseException();
Console.WriteLine("Error: {0}, Message: {1}", e.Message, baseException.Message);
}
}
5.1 Create a basic Function App
Let's see how we can create a azure function app in the portal, Click on New icon,

In next screen, click on Compute and it shows Function App, click on it
You can see the following create screen,
Add application name, subscritption, resource group and select an operation system,
You have to select App Service plan as the Hosting plan, Hosting plan is going to define how resources are going to allocate for your function app,
If we select Consumption plan, resources are dynamically added to your application as per requirements, and you only pay for the time your function app runs,
If you select App service plan, your function app runs on a dedicated VM similar to web apps, API apps and mobile apps, your function app is always running, Let's select App service plan as the hosting plan.
You have to create a storage account for your function app to use as below
We have defined all the configurations for function app to start, Let's go into the next step,

You will be prompted to this screen when
function app created, You can find
app curl, status of the
function app from this screen
5.2 Create a new function
We have to create a
new function inside this
Function app, Click on + icon as below,
You will see this screen, Click on
Custom Function to view available templates to create a
Function App
You can see available templates as below,
5.3 Create CosmosDB trigger
We are going to create a
trigger on
Azure Cosmos DB and call a function based on that, So select
CosmosDBTrigger - C# template, Then you can what are the options you want to provide in the bottom
In
Azure Cosmos DB trigger section, You can see
Azure Cosmos DB account connection, we have to provide a
Cosmos DB account to proceed the
trigger, click on
new link
You can see available
database accounts as below, Let's select our existing
Azure Cosmos DB
Give a
name to your function, You can see new
Cosmos DB account connection has been created as below,
Click on
show value in front of
Azure Cosmos DB account connection, You can see
endpoint URL to
Cosmos DB account and the
auth key as below
Provide
Database name &
Collection name to the data set we are going to work on,
You can see
Collection name for lease textbox,
Azure Cosmos DB Triger use
Cosmos DB Change feed to listen to the changes, This
trigger needs a
secondary collection to store
leases over the
partitions,
Database collection and
lease collection both should be available for the
trigger to work
Go to
trafficdata database and expand the
collections,
You can see
leases collection has been created automatically,
You can see available
documents as follows, Those
documents contains
metadata about data partitions
5.4 Run CosmosDB trigger
If you go into the Function App, you can see new function is created, Let's Run this application and see what happens,
You can see
Logs windows appears as below, it shows
Function start and
completion, And it logs
no new traces available in each minute,
Go to
Visual studio and modify
Create() method to insert a new
document into monitored
collection, Let's see this
function app can
trigger that
You can see
logs window, Since
collection got changed,
Function has been started, and it has gone inside the
if condition and printed
document id as below,
6 Change basic Function
Let's change
function app logic to detect high speed of the vehicle as follows,
Add a for loop in Run method, its going to detect a high speed value and print it in the screen
If you want you can copy high speed vehicles into another collection, may be can store it in a blob
Change the
speed of the vehicle as
112.78, and run the solution
New document is created in the Cosmos DB
collection and you can see the
log window as below
It shows
'High speed detection' message.
We have created a
trigger on Azure Cosmos DB and it fires when a change occur in a
document,
Cosmos DB has a new feature called
Cosmos DB change feed, it can continuously read
batch of changed entities, it can track list of changed documents, not only documents graphs, mongo db documents as well
When you query, as a result you get list of changed documents, list is going to depend on the
throughput of the collection
Let's say you got a
fatal error in the middle of the process, you can restart and continue from the recent change token, it's not going to miss any change
7 Download
7.1 Tech Net Gallery
You can download sample application from this location,
https://gallery.technet.microsoft.com/Create-Cosmos-DB-Documents-e4d8ae00
7.2 GitHub
You can clone the source code from here,
https://github.com/hansamaligamage/cosmoscollection-create
8 Conclusion
This article explains how to create a Azure Cosmos DB database, collection & documents using Azure Cosmos DB SDK.
We can track changes on a collection by using Azure Cosmos DB change feed. Application explains how to
run a trigger on Azure Cosmos DB data set and perform an action using a Azure Function app.
9 See Also
10 References