Introduction
This article explains how to show same confirmation box when different actions performs in a page. This demonstration creates a web application in ASP.NET Core using Visual Studio 2017
Background
If you want to know how to create a Web API application in .NET Core, check this article https://social.technet.microsoft.com/wiki/contents/articles/36340.asp-netcore-create-a-web-api-application.aspxLearn how to secure a .NET Core web application with Identity Server 4, https://social.technet.microsoft.com/wiki/contents/articles/37169.secure-your-netcore-web-applications-using-identityserver-4.aspx
Check this article if you want to secure a web application using ASP.NET Identity, with less coding https://social.technet.microsoft.com/wiki/contents/articles/37797.asp-net-identity-customize-user-authentication.aspx
Say Hello! to .NET Core in a Linux server, https://social.technet.microsoft.com/wiki/contents/articles/36330.net-core-with-a-linux-server-hello-world.aspx
If you are curious to know how to install .NET Core in a Linux server, go through this article https://social.technet.microsoft.com/wiki/contents/articles/36318.install-netcore-in-a-linux-server.aspx
Check this article to know how to create a web application in .NET Core on top of a Linux server, https://social.technet.microsoft.com/wiki/contents/articles/36333.create-a-web-application-in-netcore-with-a-linux-server.aspx
If you are interested to know how to use a template generator like Yeoman to create a web application template, please go through this article, https://social.technet.microsoft.com/wiki/contents/articles/36334.net-core-create-web-application-with-yeoman-template-generator.aspx
Create a Web application
Create a web application using Visual Studio 2017, Select ASP.NET Core Web application from C# category

Select Empty application from ASP.NET Core templates
Add landing page as index.html in wwwroot folder

Run the application and see what happens, it still shows Hello World! shows from Startup class, Let's try to set index.html file as startup page

Add header tag in index page

Let's change index.html page like this

Let's create a course web page, it displays list of modules each course has and multiple images and videos relevant to the course. When try to remove a module or an image it shows a jquery confirmation dialog, Let's see how we can show same Jquery dialog popup for all these entities (for a list of modules, set of images and videos)
Create Course web page
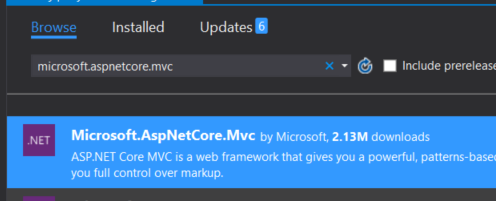
First of all, let's install ASP.NET Core MVC into the application, Go to Nuget Package Manager explorer and secrch for ASP.NET Core MVC and install mvc libraries
Create Home Controller
Create Controllers folder and add a controller, Fill Index method as follows, it's going to print below text in browser window, action method route is defined using Route attribute, When you navigate to /home it will show this text.

Run the application and navigate to home, You can view page as follows

Create a View
Create Views folder in project root directory, create index view inside Views/Home folder,

Run the application and see what it shows, navigate to home path, it shows empty page as below.

Create CourseViewModel
Create ViewModels folder in project root folder, add Course viewmodel into it. Add list of modules. images and videos as below. I created Module class inside Course class, since Course contains list of Modules

public class Course
{
public int Id { get; set; }
public string CourseTitle { get; set; }
public List<Module> Modules { get; set; }
public List<string> CourseImageUrls { get; set; }
public List<string> CourseVideoUrls { get; set; }
}
public class Module
{
public int Id { get; set; }
public string Title { get; set; }
public string Level { get; set; }
public string Lecturer { get; set; }
}

Go to HomeController and populate course viewmodel as follows, change Route attribute in Index action method

public class HomeController : Controller
{
// GET: /<controller>/
[Route("/")]
public IActionResult Index()
{
List<Module> modules = new List<Module>() { new Module {Id = 1, Title = "Frontiers of Physics", Level = "Beginner", Lecturer = "Simon De Silva" },
new Module { Id = 2, Title = "Quantum Physics", Level = "Beginner", Lecturer = "Simon De Silva" },
new Module { Id = 3, Title = "Mathematics for Physicists", Level = "Advanced", Lecturer = "Ryan Perera" } };
List<string> imageUrls = new List<string>() { "http://physicslocker.com/physicslocker/images/physics.jpg", "http://physics.uconn.edu/wp-content/uploads/sites/1363/2015/08/physics.png",
"http://www.aplusphysics.com/assets/images/slide05.png" };
List<string> videoUrls = new List<string>() { "https://www.youtube.com/embed/DxQK1WDYI_k", "https://www.youtube.com/embed/4xSPlQUejd8" };
Course course = new Course() { Id = 1, CourseTitle = "Physics", Modules = modules, CourseImageUrls = imageUrls, CourseVideoUrls = videoUrls };
return View(course);
}
}
Add Course viewmodel in Index page and show all course properties as below, show course information along with module list

@model jqueryconfirmdialog.ViewModels.Course
<div>
@Html.HiddenFor(model => model.Id)Course: @Html.DisplayFor(model => model.CourseTitle)
</div>
<br/>
<table>
<thead>
<tr>
<th style="display:none">
</th>
<th>
@Html.DisplayName("Module")
</th>
<th>
@Html.DisplayName("Lecturer")
</th>
<th>
@Html.DisplayName("Level")
</th>
<th></th>
</tr>
</thead>
<tbody>
@foreach(var item in Model.Modules)
{
<tr>
<td style="display:none">
@Html.HiddenFor(modelItem => item.Id)
</td>
<td>
@Html.DisplayFor(modelItem => item.Title)
</td>
<td>
@Html.DisplayFor(modelItem => item.Lecturer)
</td>
<td>
@Html.DisplayFor(modelItem => item.Level)
</td>
<td id="@item.Id">
@Html.ActionLink("Remove", "Delete", new { id = item.Id }, new { @id = "btnRemove" })
</td>
</tr>
}
</tbody>
</table>
<br/>
course related images and videos are shown below

<br/>
<div>
@for (var i = 0; i < Model.CourseImageUrls.Count; i++)
{
if (!string.IsNullOrEmpty(Model.CourseImageUrls[i]))
{
<img id="image_@Model.CourseImageUrls[i]" src="@Url.Content(Model.CourseImageUrls[i])" style="width:200px; height:200px" />
}
<input id="btnImageRemove" type="button" value="Remove" class="btn btn-default" />
}
</div>
<br/>
<div>
@for (var i = 0; i < Model.CourseVideoUrls.Count; i++)
{
if (!string.IsNullOrEmpty(Model.CourseVideoUrls[i]))
{
<object width="320" height="240" data="@Url.Content(Model.CourseVideoUrls[i])"></object>
}
<input id="btnVideoRemove" type="button" value="Remove" class="btn btn-default" />
}
</div>
Run your application and see what it shows, It shows course name, list of available modules, images and videos related to the course

Now show a confirmation dialog box when you want to delete a module, when deleting an image and video, for all these 3 actions need to use same Jquery dialog box, Let's see how we can achieve that
When document loads, write jquery method to show delete module click event,
select remove link in modules list and try to show confirm dialog box, When calliing confirm dialog box it assign two parameters as type and module, When we set parameters in click event, we can extract them in dialog box initialisation

<script>
$(function () {
debugger;
$('a[id*=btnRemove]').click(function (e) {
debugger;
e.preventDefault();
var id = $(this).parent()[0].id;
var data = $('#confirmDialog').data();
data.type = 1;
data.module = id;
$('#confirmDialog').dialog('open');
});
});
</script>
<script src="https://ajax.aspnetcdn.com/ajax/jquery/jquery-2.2.0.min.js"></script>
<script src="https://ajax.aspnetcdn.com/ajax/jquery.ui/1.11.4/jquery-ui.min.js"></script>
create confirm dialog box as below,

<div id="confirmDialog" title="Save changes" hidden>
<p>Do you want to save changes </p>
</div>
Run your application and click on Remove link, it shows error page as below, It says confirm dialog initialisation has not happened, we have to initialize the confirm dialog box before open it


Let's initialize confirmation dialog box as follows, we'll implement OK button later in this example

$("#confirmDialog").dialog({
autoOpen: false,
modal: true,
resizable: false,
buttons: {
"Ok": function () {
},
"Cancel": function (e) {
   $(this).dialog("close");
                }
},
});
Run application and check whether confirmation dialog box shows


It shows as above, let's add some css changes and style this a bit, Add references to Jquery and Jquery-ui style files
<link rel="stylesheet" href="https://ajax.aspnetcdn.com/ajax/bootstrap/3.3.6/css/bootstrap.min.css"/>
<link rel="stylesheet" href="//code.jquery.com/ui/1.12.1/themes/base/jquery-ui.css"/>
Now run the application and how it looks,


Let's fill OK button click when removing a module from list, If you remember when Remove link is clicked we passed type as 1 and clicked module id, in OK button of jquery dialog, we can track that

$("#confirmDialog").dialog({ autoOpen: false, modal: true, resizable: false, buttons: { "Ok": function () { var type = $(this).data('type'); var module = $(this).data('module'); if(type == 1) window.location.href = '/Home/RemoveModule?id=' + module; }, "Cancel": function (e) { $(this).dialog("close"); } }, }); Let's implement controller action method to delete a module

public IActionResult RemoveModule(int id) { Module module = modules.Find(p => p.Id == id); if(module != null) modules.Remove(module); Course course = new Course() { Id = 1, CourseTitle = "Physics", Modules = modules, CourseImageUrls = imageUrls, CourseVideoUrls = videoUrls }; return View("Index", course); }We haven't add routing options to this application, let's add default routing, then it will redirect to list of modules page with new list,
Go to startup class and in Configure method ass default routing to handle request urls.

app.UseMvc(routes => routes.MapRoute("default", "{controller=Home}/{action=Index}/{id?}"));
Run the application and delete a module and check whether it works,

Let's try to remove an image/video from a course, let's take image type as 1 and video type as 2. we have to pass type of resource and specific resource is getting deleted.
Let's create Resource class to hold Image and Video information

public class Resource
{
public int Id { get; set; }
public string Url { get; set; }
}
We had to change modules list used to display the grid as follows,

Let's add image remove button click implementation, using jquery selector ('input[id*=btnImageRemove]') we can track remove link click, then get id attribute of selected parent element as follows,

$('input[id*=btnImageRemove]').click(function () {
var id = $(this).parent()[0].id;
var data = $('#confirmDialog').data();
data.type = 2;
data.id = id;
$('#confirmDialog').dialog('open');
});
as same as image remove link, let's add video remove link

$('input[id*=btnVideoRemove]').click(function () { var id = $(this).parent()[0].id; var data = $('#confirmDialog').data(); data.type = 3; data.id = id; $('#confirmDialog').dialog('open'); });
When click on OK button in confirm dialog box, it check type of event, according to type at first it removes a module then it tries to remove a image or video

$("#confirmDialog").dialog({ autoOpen: false, modal: true, resizable: false, buttons: { "Ok": function () { var type = $(this).data('type'); if (type == 1) { // remove a module var module = $(this).data('module'); window.location.href = '/Home/RemoveModule?id=' + module; } else // remove an image or video { var id = $(this).data('id'); window.location.href = '/Home/RemoveResource?id=' + id + '&type=' + type; } }, "Cancel": function (e) { $(this).dialog("close");
} } });

public IActionResult RemoveResource(int id, int type) { if (type == 2) //image { Resource resource = imageUrls.Find(p => p.Id == id); if (resource != null) imageUrls.Remove(resource); } else if (type == 3) //videos { Resource resource = videoUrls.Find(p => p.Id == id); if (resource != null) videoUrls.Remove(resource); }
Course course = new Course() { Id = 1, CourseTitle = "Physics", Modules = modules, CourseImageUrls = imageUrls, CourseVideoUrls = videoUrls };
return View("Index", course); }Let's run this application and check whether it works,
We are showing a course entity along with list of modules, image and video resources. we havent used any storage to store this course entity, simply using a course object.

